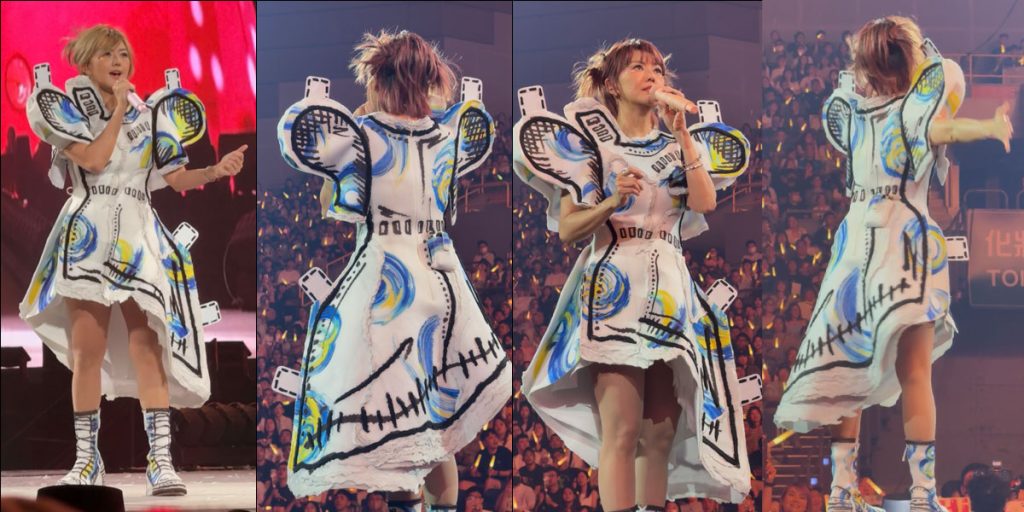
I wanted to recreate an iconic outfit from Stefanie Sun’s Aut Nihilo concert as a small 3D-printed toy figure. My background in 3D modelling dates back to almost 20 years ago and I am keen to not revisit the nightmare. So instead of going the traditional route, I experimented with an AI-assisted workflow.
The idea was to generate a 2D character, convert it into a 3D model using AI and print it. In reality, it took a lot of trial and error.
The Workflow at a Glance
- Generate a 2D character from photo references
- Convert the 2D image into a 3D model using Meshy AI
- Prepare the model for printing (with minimal edits)
- Slice and 3D print
- Paint with colours
Tools I Used
- ChatGPT
To generate the 2D image and help structure prompts for Meshy. - Meshy AI
To convert the 2D image into a 3D model. - 3D Slicer Software
To slice the model and prepare it for printing. - 3D Printer
The printer used for the final output (I am using my own Creality Ender 3 V3 SE). - Faber-Castell Acrylic Paint
Step 1: Gather Photo References
Ideally, prepare front, back and side views. The clearer and more consistent your references, the easier it is for both the 2D generation later.
Step 2: Subscribe to Meshy
A one-month Pro subscription is about S$26, new users may get it cheaper depending on promos.
(Disclaimer: By using the above referral link, you will receive 30 days of Pro for $1 + 50% off for the following two months, while I receive Meshy credits).
Step 3: Generate an Orthographic 2D Character from References
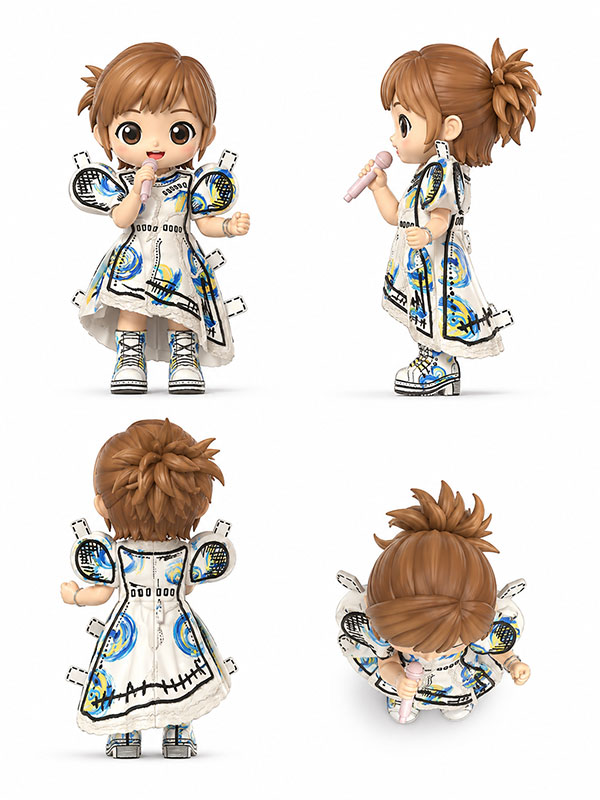
I used ChatGPT to generate a stylised, orthographic view of the character based on the photo references from the concert.
Prompt used:
cute chunky 3d product render of this character model in popmart style, 2:3 head-to-body ratio, simplified friendly features. presented as a 4-view orthographic reference sheet on a plain white seamless background: front view, side view, back view and top view, evenly spaced and consistently proportioned
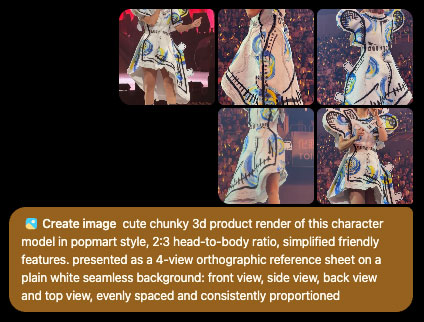
Here’s the result:
Step 4: Craft a Meshy Prompt (with ChatGPT’s Help)
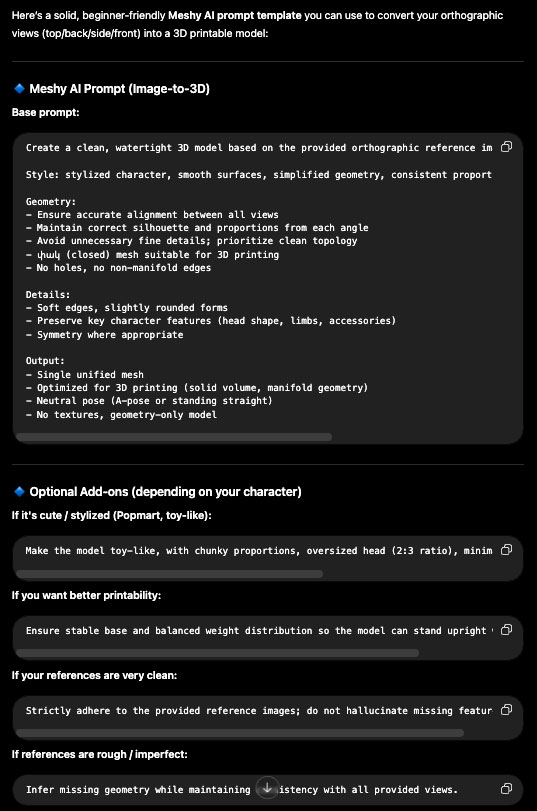
I started a new chat in ChatGPT to generate a prompt specifically for Meshy, based on the 2D orthographic image.
Prompt used:
i have a 2d orthographic view of a 3d character model. write a prompt that transform it to a 3d printable model using meshy ai
ChatGPT can provide a base prompt that is comprehensive enough for Meshy, along with optional follow-ups. Feel free to tweak it to suit your needs.
Step 5: Convert the 2D Image into a 3D Model with Meshy
Copy and paste the orthographic image and prompt into Meshy. The results were mixed.
I went through multiple iterations in Meshy. At some point, I accepted that AI isn’t perfect and aimed for a “good enough” version.
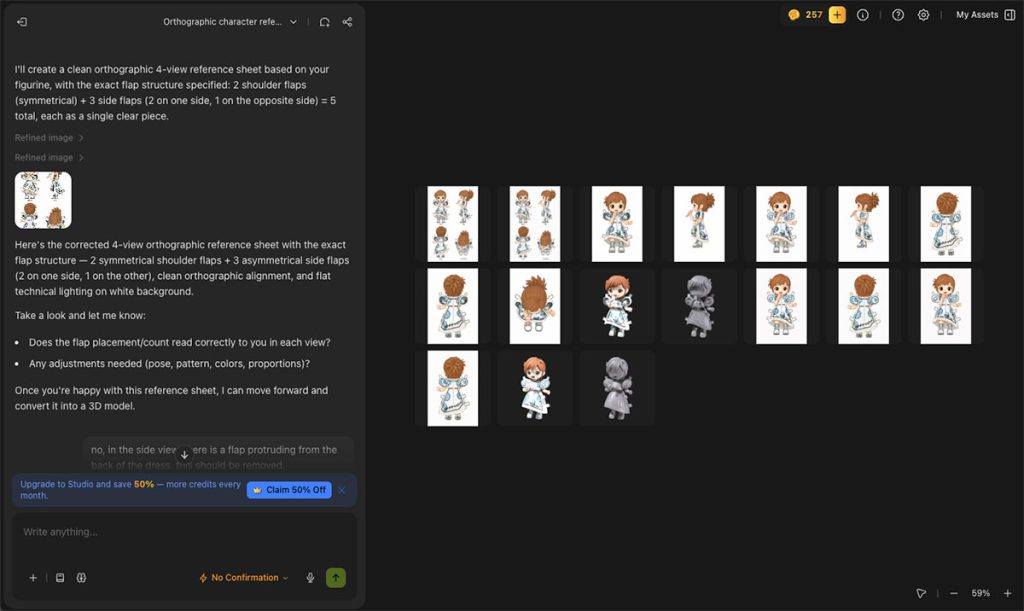
Common Issues with AI-Generated 3D Models
- Extra elements appeared (e.g. additional flaps that weren’t in the design)
- Missing details in some areas
- Random small holes in the mesh
- Some parts were interpreted as textures instead of flat surfaces
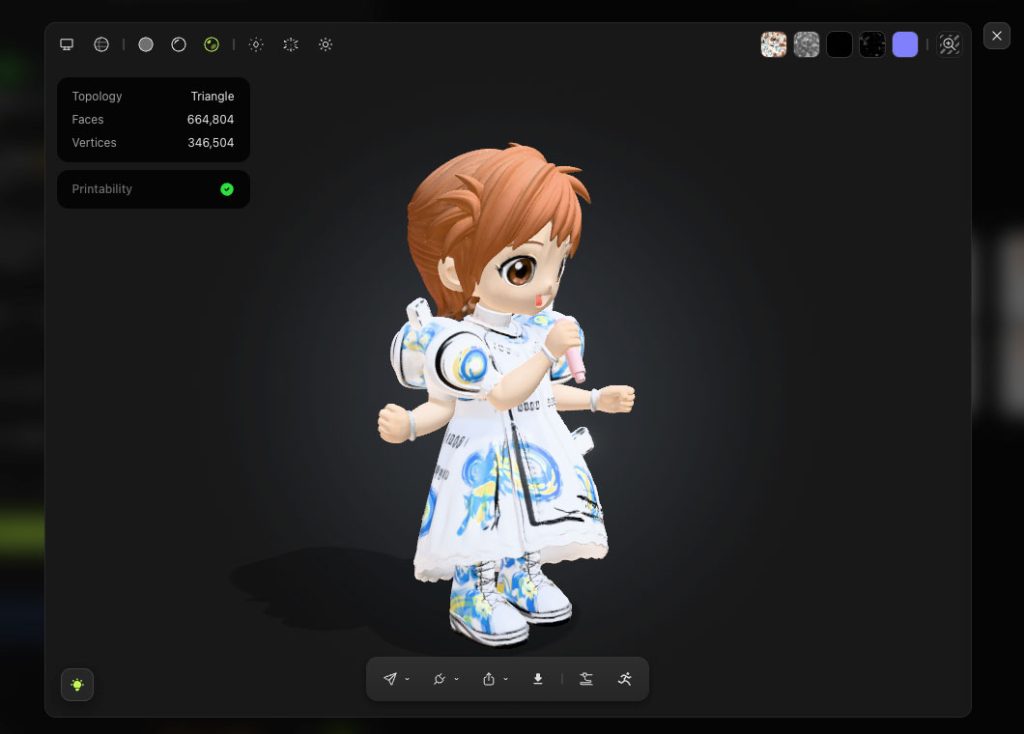
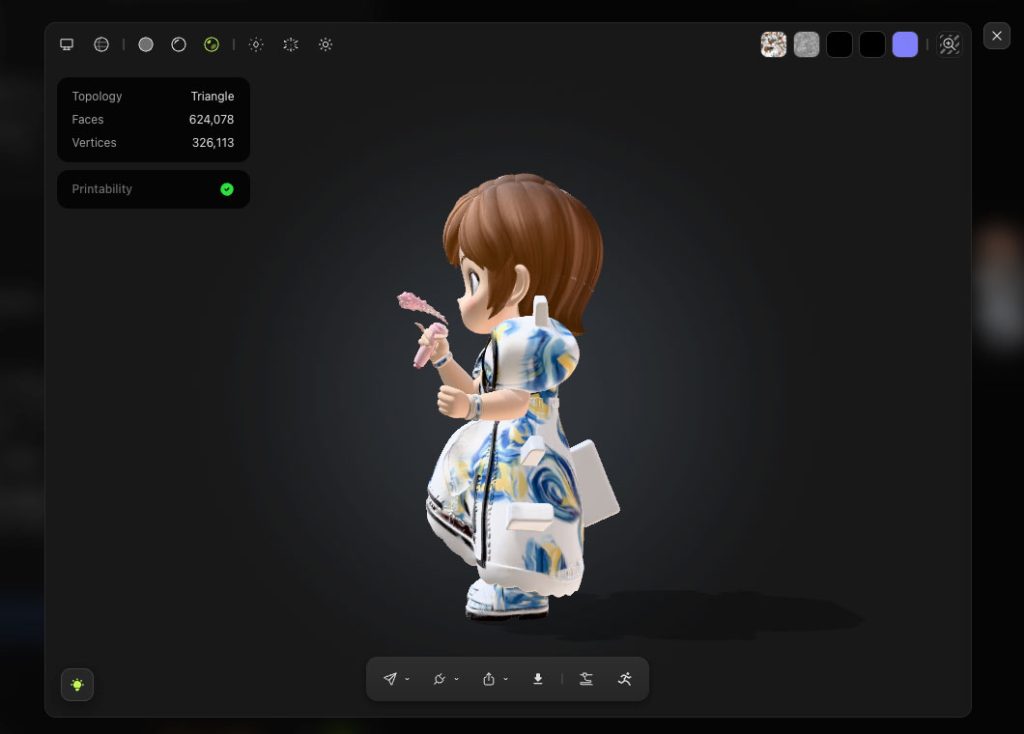
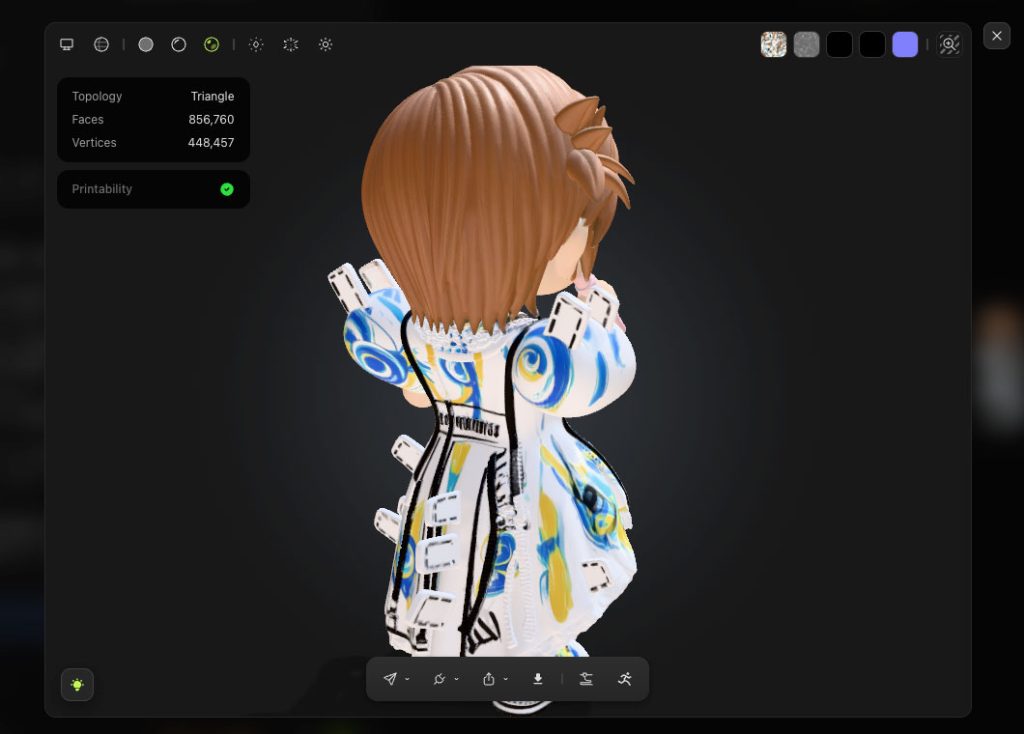
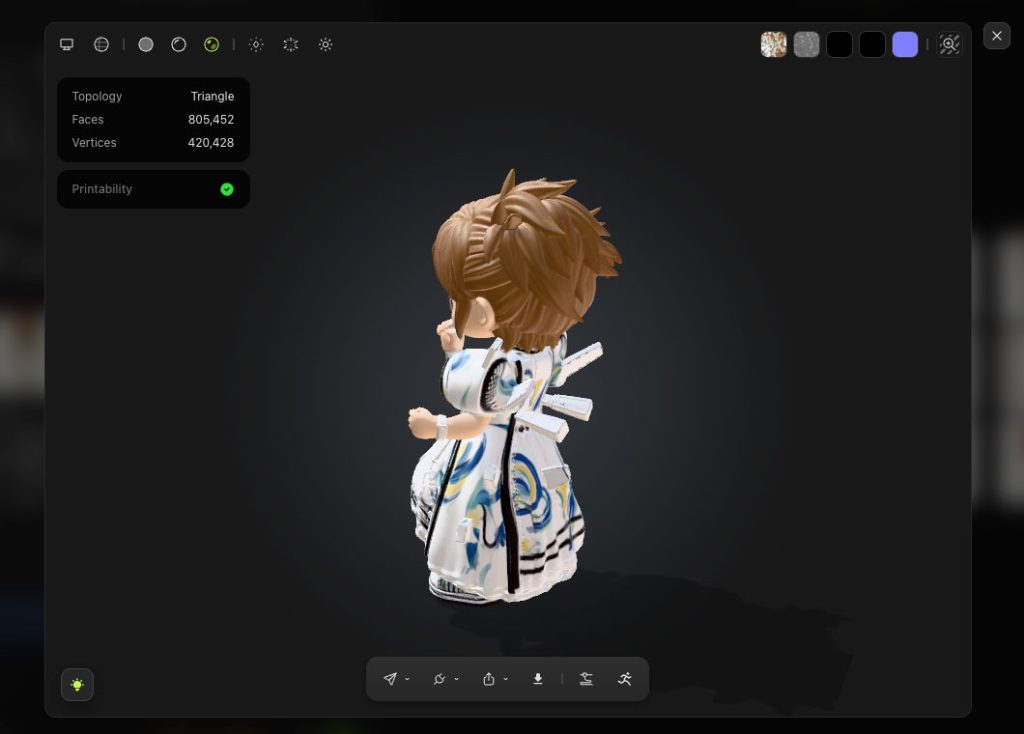
Once I had a satisfactory version, I exported the file.
Step 6: Prepare the Model for Printing
I didn’t use tools like Blender or Meshmixer to fix the model, mainly because I didn’t know how. Instead, I accepted the imperfections although it was not ideal, but it worked well enough.
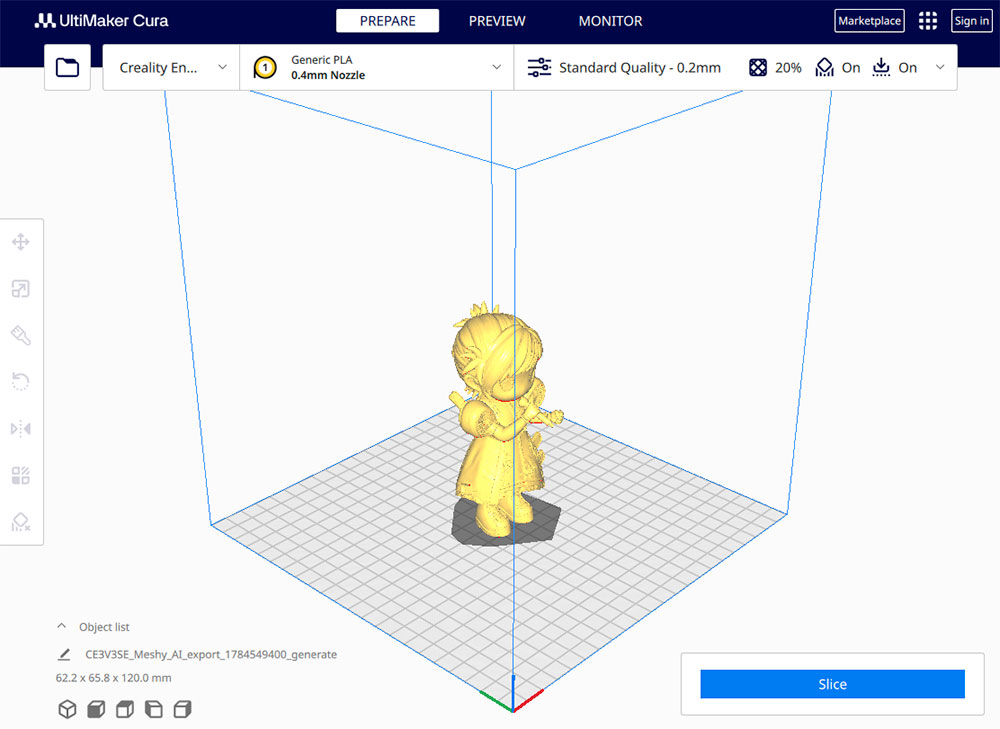
Step 7: 3D Printing
- Printer: Creality Ender 3 V3 SE
- Material: PLA
- Print time: ~6.5 hours
- Failed attempts: 4
Most of the failures were due to poor support and adhesion, so each failed print helped me tweak the print settings slightly.
Slicer Settings that Worked
- Supports: Tree supports, set to “everywhere”
- Adhesion: Enabled (to improve bed sticking)
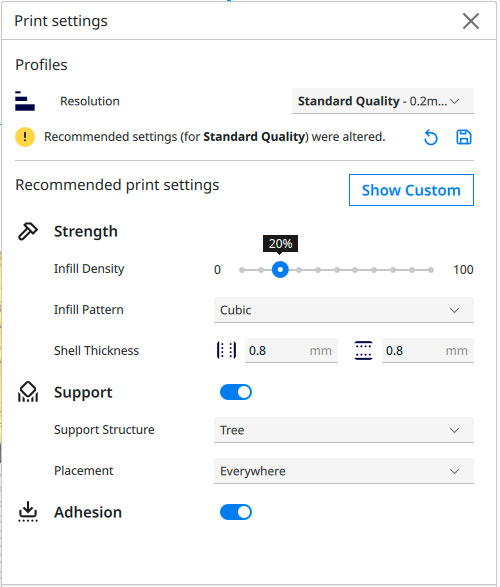
Step 8: Cleaning Up
After printing, I removed the supports and cleaned up the model. This step is quite manual:
- Breaking away tree supports and overhands carefully
- Sanding off rough edges
- Accepting that some marks will remain
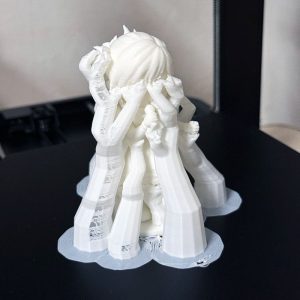
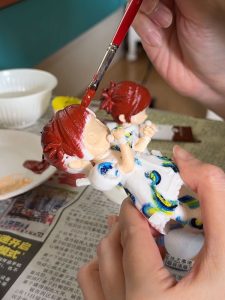
Step 9: Hand Painting with Acrylic Paint
To bring the piece closer to the original outfit, I hand-painted the model with acrylic paint. It helped define details lost in printing, masked print imperfections and made the piece more complete.
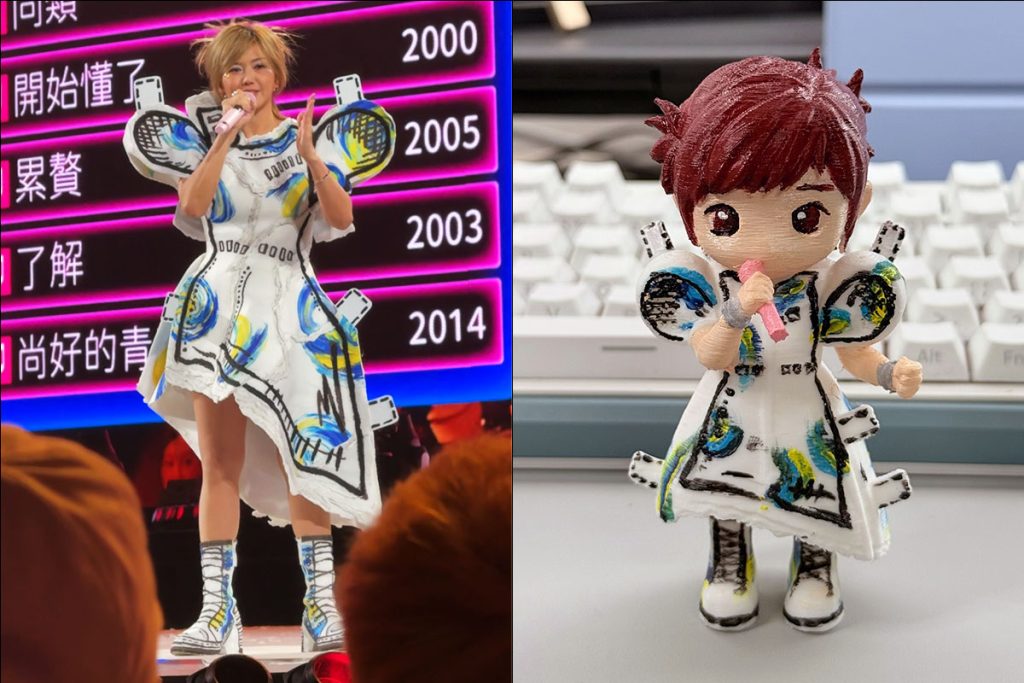
Final Result: How Close Was the 3D Print?
It’s not perfect, but it captures the overall look of the outfit. Some details are off and the geometry isn’t as clean as a manually modelled piece, but it’s recognisable.
Lessons Learned from My First 2D to 3D Printing Attempt
- There is no one correct way to do this
- AI tools like Meshy AI are powerful but unpredictable
- You don’t need to master 3D modelling to get started, but it definitely helps
- Trial and error is part of the process
- Accept imperfections
Final Thoughts: Is AI-Assisted 3D Printing Worth Trying?
This was less about getting a perfect result, and more about exploring what’s possible with the tools available today.
If you are thinking of trying something similar, don’t worry too much about doing it “correctly”. There isn’t a fixed workflow. Just experiment, iterate and see what works.
AI lowers the barrier, but it doesn’t remove the need to think, test and adjust. And sometimes, that’s the fun part!